The critical failure of cheap plastic latches isn’t just that they break; it’s that they create a false sense of security, whereas magnetic locks provide a robust, system-level defence against a determined toddler.
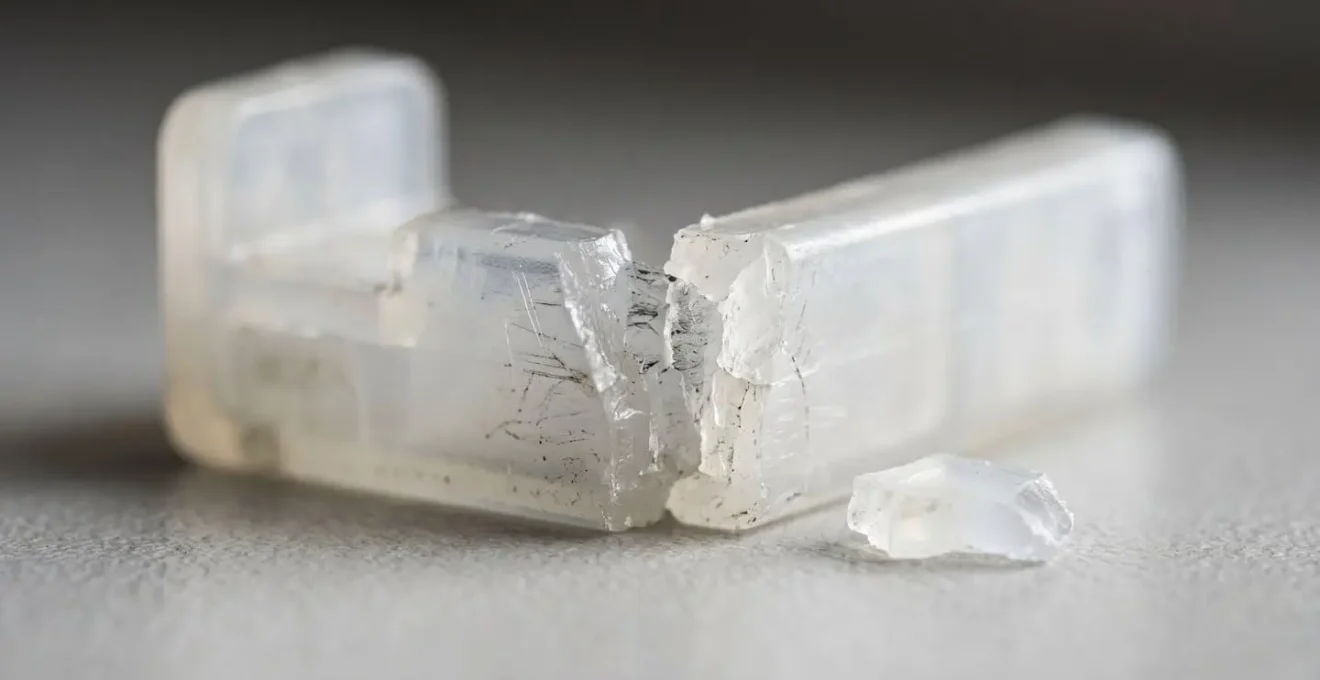
- Plastic latches suffer from material fatigue, visibly cracking and failing under the repeated, low-force pulling a toddler can exert over days.
- Quality magnetic locks use neodymium magnets with up to 35lbs of holding force, making them virtually impossible for a child to defeat through brute strength.
Recommendation: Prioritise drill-mounted magnetic locks for all cabinets containing hazardous materials (medicines, cleaning supplies) and use adhesive versions for less critical storage. Avoid cheap plastic latches entirely for any high-risk items.
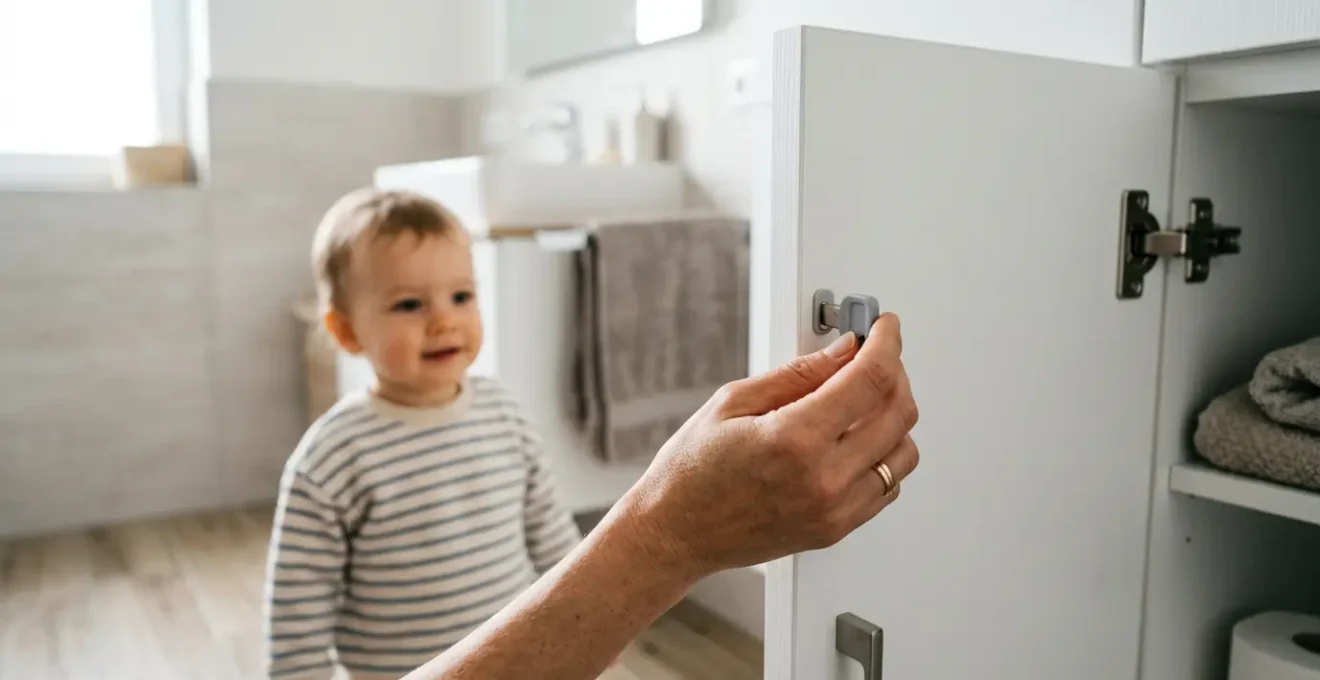
For a new parent in the UK, the moment your baby becomes mobile is a mix of pride and panic. One day they are stationary, the next they are an explorer, and your home transforms into a landscape of potential hazards. The immediate instinct is to secure drawers and cabinets, especially in the bathroom and kitchen. Many parents reach for the most visible and seemingly simple solution: cheap, plastic adhesive latches. They’re inexpensive, easy to find, and promise a quick fix.
However, this common first step is often a dangerous one. The debate isn’t just about plastic versus magnetic; it’s about understanding the mechanics of failure and the psychology of a curious toddler. The real key to effective childproofing isn’t just installing a barrier; it’s choosing a system that accounts for material fatigue, persistent testing, and the critical difference between a visual deterrent and a truly secure lock. This is where magnetic locks reveal their fundamental superiority, not as a gadget, but as a core component of a reliable safety strategy.
This guide will move beyond surface-level comparisons. We will dissect the specific dangers lurking in your home, analyse why plastic latches fail under real-world toddler testing, compare the engineering of different lock types, and provide a systematic approach to creating a genuinely safe environment for your child. It’s time to think like a childproofing consultant and make decisions based on safety engineering, not just price.
To help you navigate this critical aspect of home safety, we’ve structured this guide to cover every angle, from identifying the most urgent threats to implementing a complete, room-by-room safety audit. Explore the sections below to build a comprehensive childproofing plan.
Summary: Why Magnetic Locks Beat Plastic Latches for Keeping Medicines Away From Toddlers?
- What 7 Common Bathroom Items Can Poison Your Toddler in Under 5 Minutes?
- Adhesive Magnetic Locks vs Drill-Mounted Locks: Which Survives a Determined 2-Year-Old?
- Where to Store Bleach, Dishwasher Tablets, and Laundry Pods Away From Little Hands?
- Why Your £3 Plastic Cabinet Lock Fails After 2 Weeks of Toddler Testing?
- How to Give Your Toddler Their Own « Yes Drawer » While Locking the Dangerous Ones?
- How to Audit Each Room for Hazards Using a 50-Point Safety Checklist?
- Which Button-Press, Pull-String, and Drop-Ball Toys Build Cognitive Connections?
- Why Babyproofing at 3 Months Prevents the A&E Visit at 7 Months?
What 7 Common Bathroom Items Can Poison Your Toddler in Under 5 Minutes?
The bathroom is often seen as a place of hygiene, but from a toddler’s perspective, it’s a treasure trove of colourful, intriguing objects. Unfortunately, many of these everyday items are highly toxic. The danger is not just theoretical; household cleaning substances, cosmetics/personal care products, and analgesics are the top three exposure categories for children under five. A toddler cannot discern between a bottle of brightly coloured mouthwash and a bottle of juice, and this confusion can lead to a tragic accident in minutes.

As this image illustrates from a toddler’s eye-level, the appeal is obvious. Each day in the US alone, 300 children end up in an emergency room due to toxic ingestion. The most common culprits found in a UK bathroom include:
- Mouthwash: Often brightly coloured and containing high levels of alcohol.
- Painkillers (Paracetamol, Ibuprofen): Can look like sweets and cause severe liver or kidney damage.
- Vitamins: Especially iron-containing supplements, which are extremely toxic to children.
- Cosmetics: Nail polish remover (acetone), perfumes (alcohol), and even some lotions can be harmful if ingested.
- Cleaning Products: Toilet bowl cleaner and mildew removers are highly corrosive.
- Prescription Medications: Any medication left on a counter is a critical risk.
- Essential Oils: Highly concentrated and can be poisonous if swallowed.
This isn’t about fear-mongering; it’s about a clear-eyed assessment of risk. A simple, unlocked cabinet is an open invitation to a catastrophe that can happen in the time it takes to answer the door. This is the ‘why’ behind robust cabinet security.
Adhesive Magnetic Locks vs Drill-Mounted Locks: Which Survives a Determined 2-Year-Old?
Once you’ve decided on magnetic locks, the next choice is installation: adhesive or drill-mounted? While adhesive locks promise a quick, drill-free setup, a childproofing consultant’s primary focus is on the point of failure. An adhesive bond is only as strong as the surface it’s applied to and the quality of the adhesive itself. For a determined toddler who can apply persistent, repeated pulling force, this is often the weak link. Drill-mounted locks, by contrast, are anchored to the structural integrity of the cabinet itself, offering a far more robust defence.
As the testing team at BabyGearLab notes, even the best magnetic locks have potential vulnerabilities, stating:
The magnet locks are nearly impossible for a child to open, at least until they figure out the key secret and learn where you keep the key. If you tug hard enough and are persistent, we’ve seen this latch style fail during everyday use.
– BabyGearLab Testing Team, The Best Cabinet Locks – Tested & Ranked
This highlights that the lock mechanism is strong; the failure point is almost always the installation method. A drill-mounted lock minimises this risk. The choice depends on your property (rental vs. owned) and the level of risk behind the door. For storing cleaning chemicals, drill-mounted is the only professional recommendation. For a drawer with tea towels, adhesive is a reasonable compromise. The following table breaks down the key differences to inform your decision.
| Feature | Adhesive Magnetic Locks | Drill-Mounted Magnetic Locks |
|---|---|---|
| Installation Time | 1-5 minutes per lock | 15-20 minutes per lock |
| Tools Required | None (cleaning cloth only) | Drill, screwdriver, measuring tape |
| Cabinet Compatibility | Smooth, non-porous surfaces only | All cabinet materials (wood, MDF, particleboard, laminate) |
| Holding Force | Moderate (weakens over time with pulling) | High (up to 35 lbs sustained force) |
| Durability | 6-12 months under heavy use | Years of consistent performance |
| Removal | Easy but leaves adhesive residue | Requires filling screw holes |
| Rental-Friendly | Yes | No (permanent modification) |
Where to Store Bleach, Dishwasher Tablets, and Laundry Pods Away From Little Hands?
The principle for storing hazardous chemicals is simple: create multiple layers of defence. Relying on a single safety measure is a gamble. Storing items « up high » is a good start, but a determined toddler can be a surprisingly adept climber. Likewise, a cabinet lock is effective, but what if a visitor leaves the cabinet open? The safest strategy combines elevation, a physical barrier, and container security into a single, robust system. This « 3-Layer Safety System » ensures that even if one layer fails, others remain in place to protect your child.
This multi-layered approach is crucial because the home is, by far, the most common site of accidental poisoning. In fact, data from Nationwide Children’s Hospital shows that more than 9 in 10 poisonings in children happen right within their own homes. The under-sink cabinet, often used for storing dishwasher tablets and cleaning supplies, is ground zero for this risk. Similarly, laundry pods, with their bright colours and squishy texture, are dangerously appealing and must be secured with the highest level of care. A proper storage strategy isn’t just about one lock; it’s about a comprehensive plan.
To implement this, follow these three non-negotiable layers of safety:
- Layer 1 – Elevation: Store all hazardous products, especially concentrated items like bleach and laundry pods, on shelves at least 5 feet high. This places them well above a toddler’s reach, even when using a chair as a makeshift ladder.
- Layer 2 – Barrier: Install heavy-duty, drill-mounted magnetic cabinet locks on all cabinets containing these chemicals, even the elevated ones. This provides a powerful physical barrier that a child cannot defeat.
- Layer 3 – Container Security: Always keep products in their original, child-resistant packaging. Never transfer chemicals to other containers. For visiting relatives, particularly grandparents, a « Grandparent Safety Protocol » is essential: move all their hazardous items to one high, inaccessible spot for the duration of the visit and use portable locks on lower cabinets.
This systematic approach removes the guesswork and drastically reduces the risk of a preventable accident.
Why Your £3 Plastic Cabinet Lock Fails After 2 Weeks of Toddler Testing?
The appeal of a cheap plastic cabinet latch is understandable: it’s a low-cost, seemingly simple solution. However, its failure is not a matter of ‘if’, but ‘when’. The fundamental flaw lies in its material and design. These latches are typically made from brittle polymers that are susceptible to material fatigue. A toddler’s « testing » isn’t a single, high-force event; it’s a series of persistent, low-force tugs, wiggles, and pulls repeated dozens of times a day. Each pull creates micro-fractures in the plastic, weakening the latch until it inevitably snaps.
This is the critical difference between plastic and magnetic locks. A plastic latch relies on its own physical integrity to resist force, an integrity that degrades with every use. A magnetic lock, on the other hand, outsources its strength to the powerful, unchanging force of a magnet. As childproof lock testing data shows, Neodymium magnets in quality locks can generate up to 35 pounds of holding force. A toddler cannot overcome this force, and the magnet does not get « tired » or « weaker » from repeated attempts. The failure mode is entirely different: the plastic latch breaks, while the magnetic lock simply holds. This is why experts caution against low-quality options.
As the Child Safety Store Experts advise, the quality of the magnet is paramount:
Avoid magnetic locks that have weak magnets. This is common in cheaper locks since they likely have cheaper magnets.
– Child Safety Store Experts, Child Safety Locks & Latches Guide
Ultimately, a £3 plastic latch provides a dangerous illusion of safety. It may work for a few days, lulling you into a false sense of security. But under the rigorous, persistent testing of a curious toddler, its failure is a mechanical certainty.
How to Give Your Toddler Their Own « Yes Drawer » While Locking the Dangerous Ones?
Effective childproofing is not just about saying « No. » A toddler’s relentless drive to open cabinets is rooted in a natural desire to explore, imitate, and understand their world. Constantly blocking this impulse can lead to frustration for both parent and child. A far more effective and positive strategy is redirection, and the « Yes Drawer » is the cornerstone of this approach. By designating one low, accessible drawer or cabinet as a completely safe space for them to explore, you satisfy their curiosity while teaching them about boundaries.
The key is to place this « Yes Drawer » in the same area where they are most drawn to the « No » cabinets, such as the kitchen. When they start to pull on a locked cabinet, you can calmly redirect them: « That one is locked, but you can play with everything in your special drawer! » This proactive strategy transforms a potential conflict into a learning opportunity, reducing daily battles and empowering your child with a sense of autonomy in a safe, controlled environment. The contents of the drawer should be engaging, safe, and rotated periodically to maintain interest.
To be effective, the items in the « Yes Drawer » should be age-appropriate and cater to their developing skills. Here is a simple guide for stocking the drawer:
- 12-18 Months: Focus on sensory exploration and mimicry. Fill the drawer with items like wooden spoons, silicone spatulas, lightweight plastic bowls, and measuring cups. These are safe to handle and mouth, and they allow the toddler to imitate your activities in the kitchen.
- 18-24 Months: Introduce simple challenges for fine motor skills. Add simple nesting cups, large plastic nuts and bolts, and child-safe containers with lids that snap on and off. These items encourage problem-solving and hand-eye coordination.
- 24-36 Months: Cater to growing cognitive abilities. Include larger building blocks (too big to be a choking hazard), simple shape sorters, and safe kitchen tools like plastic tongs. These toys challenge their planning and reasoning skills while remaining completely safe for independent play.
This strategy turns a potential battleground into a zone for positive development, making your childproofing efforts feel less restrictive and more constructive.
How to Audit Each Room for Hazards Using a 50-Point Safety Checklist?
A truly safe home is the result of a systematic audit, not a frantic, piecemeal effort. To be effective, you must adopt your toddler’s perspective—literally. Getting on your hands and knees reveals a world of hazards completely invisible from an adult’s height: dangling cords, loose coins under the sofa, and accessible power strips behind furniture. This « Toddler’s Eye-View » is the single most important principle of a home safety audit. It shifts your mindset from « what looks dangerous to me? » to « what is accessible and intriguing to my child? ».
The stakes of this audit are incredibly high. According to the Centers for Disease Control and Prevention, unintentional injuries are a leading cause of death in children between the ages of 1 and 4. This sobering statistic underscores the need for a rigorous, methodical approach. Instead of a room-by-room checklist, it’s more effective to organise your audit by a « danger type » checklist, ensuring you are hunting for specific hazards (ingestion, falling, strangulation, burns) throughout the entire house. This prevents you from overlooking a burn risk in the living room or a falling risk in the bedroom. You must actively challenge your own assumptions; physically test furniture for stability rather than assuming it’s safe.
Your 5-Step Hazard Audit Plan: A Toddler’s-Eye View Methodology
- Get Low: Systematically crawl through every room on your hands and knees. Document every cord, outlet, small object, and un-anchored piece of furniture you can now see and reach.
- Categorise by Danger: Group your findings not by room, but by hazard type: Ingestion (pills, pods, batteries), Falling/Tipping (TVs, bookcases), Strangulation (blind cords), and Burns/Electrical (outlets, stove knobs).
- Stress-Test for Stability: Go to every major piece of furniture (dressers, TV stands, bookshelves) and push on it firmly. If it wobbles, it’s a tipping hazard and must be anchored to the wall immediately. No exceptions.
- Conduct a Visitor Audit: When visiting a home not baby-proofed (e.g., grandparents), perform a rapid 5-point check: secure all medications, install temporary cabinet locks, cover outlets, clear low surfaces, and block stairs.
- Create and Execute a Remediation Plan: Don’t just make a list. Immediately lock up, move, or secure every identified hazard. Prioritise medications, cleaning supplies, and anchoring furniture as your first actions.
This structured method moves you from reactive worry to proactive prevention, creating a genuinely secure environment where your child can safely explore.
Which Button-Press, Pull-String, and Drop-Ball Toys Build Cognitive Connections?
While securing the environment is paramount, child development is not just about preventing harm; it’s about providing the right tools for growth. Once the « No » zones are locked down, the « Yes » zones—like the ‘Yes Drawer’ or a play area—should be filled with toys that are not only safe but also specifically designed to build crucial cognitive connections. Simple, cause-and-effect toys are the workhorses of early cognitive development, teaching foundational concepts that pave the way for more complex learning.
Toys that require a direct action to produce a result—pressing a button to hear a sound, pulling a string to move an object, or dropping a ball to see it reappear—are fundamental for a toddler’s brain. They help a child grasp three critical concepts:
- Cause and Effect: « When I do X, Y happens. » This is the beginning of logical reasoning.
- Object Permanence: « Even when I can’t see the ball, it still exists and will come out the other side. » This is a massive cognitive leap.
- Problem-Solving: « How do I get the block to fit in the hole? » This builds spatial awareness and planning skills.
Choosing the right toy for the right developmental stage maximises these benefits while ensuring safety. The size of components is non-negotiable; any part must be larger than 1.75 inches in diameter to eliminate choking risks.
Here is a guide to mapping specific toy types to the skills they develop, helping you stock your safe play areas with purpose.
| Toy Type | Primary Cognitive Skill Developed | Physical Skill Developed | Age Range | Safety Note |
|---|---|---|---|---|
| Button-Press Toys | Cause & Effect Understanding | Finger strength, precision pincer grasp | 12-24 months | Ensure no small detachable parts |
| Pull-String Toys | Coordination & Sequencing | Fine motor skills, bilateral coordination | 18-30 months | String must be under 12 inches to avoid strangulation risk |
| Drop-Ball Toys | Object Permanence & Problem-Solving | Hand-eye coordination, spatial awareness | 12-36 months | Balls must be larger than 1.75 inches diameter (no choking hazard) |
| Simple Stacking Toys | Planning & Spatial Reasoning | Gross motor control, balance | 15-36 months | Large pieces only, no sharp edges |
Key Takeaways
- The primary failure of cheap plastic latches is material fatigue from repeated toddler testing, creating a false sense of security.
- Drill-mounted magnetic locks offer superior, reliable holding force (up to 35lbs) that does not degrade over time, making them the professional choice for high-risk items.
- A multi-layered safety strategy (Elevation + Barrier + Container Security) is essential for storing hazardous chemicals, as one layer alone is not sufficient.
Why Babyproofing at 3 Months Prevents the A&E Visit at 7 Months?
The most common mistake parents make in babyproofing is waiting until their child is mobile. This is a critical, and potentially dangerous, miscalculation. The golden rule of child safety is to act proactively, not reactively. Babyproofing when your infant is 3 months old and largely immobile may feel premature, but it is the most strategic and effective time to do it. At this stage, you have the time, energy, and clear-headedness to perform a thorough, systematic audit of your home without the added stress of constantly chasing a newly mobile crawler.
Child safety experts highlight a crucial concept known as the « milestone lag. » This is the gap between a baby’s rapid physical development and their much slower cognitive development of impulse control and danger awareness. A baby can learn to roll, crawl, and pull themselves up with surprising suddenness, often weeks or months before parents expect. One day they are static, the next they are across the room, reaching for a power cord. By babyproofing early, you are preparing for the baby you will have in a few months, not the one you have today. As child product safety expert Nancy Cowles puts it:
Start before you need to. Your 3-month-old won’t really need cabinet locks to keep them away from the cleaning supplies, but your 13-month-old likely will.
– Nancy Cowles, Child Product Safety Expert
This proactive approach means you act as your baby’s « external brain, » anticipating and neutralising hazards before they ever have a chance to access them. Waiting until 7 or 8 months, when they are already on the move, turns babyproofing into a frantic, exhausting race against your child’s boundless curiosity—a race you can’t afford to lose.
Installing locks, anchoring furniture, and covering outlets at 3 months is an investment in future peace of mind. It prevents the panicked A&E visit at 7 months that happens when a developmental leap takes a parent by surprise. It is the single most important strategic decision you can make to ensure your child’s safety during their first years of life.
Now that you understand the risks, the solutions, and the strategy, the next logical step is to implement this knowledge. Begin your room-by-room audit today, starting with the highest-risk areas like the kitchen and bathroom, and invest in the reliable security of magnetic locks for a truly safe home.