The secret to a stress-free hospital bag isn’t packing more; it’s packing smarter with a modular system designed for the realities of an NHS ward.
- Prioritise your own physical recovery with the right-sized clothing and a multi-stage maternity pad strategy.
- Plan for all birth outcomes (vaginal, water, C-section) by separating items into accessible, scenario-specific ‘modules’.
Recommendation: Ditch the single, oversized bag. Adopt a three-bag system (Triage, Labour, Postnatal) to ensure you have exactly what you need, right when you need it.
Staring at the endless hospital bag checklists online can feel like the first big test of parenthood. The lists are long, the advice is generic, and you’re left wondering what you’ll *actually* use on a busy NHS postnatal ward. Most guides suggest one giant bag, filled with everything from books you’ll never open to dozens of tiny outfits. They tell you what to pack, but not why, or how it all fits into the reality of labour and recovery.
As a midwife, I see the results of this advice every day: new mothers frantically searching for a single nappy in an overflowing suitcase, or partners being sent on desperate missions for high-waisted underwear. The truth is, efficient packing isn’t about having more stuff; it’s about having the right stuff, organised for every possibility. But what if the key wasn’t a longer checklist, but a completely different strategy? What if you packed not just for the baby, but strategically for your own recovery and for any birth scenario?
This guide is your insider’s view from the labour ward. We’ll bypass the fluff and focus on a practical, midwife-approved system. We will cover why your choice of maternity pads is more important than you think, how to build a bag that adapts to any birth, the clothes that genuinely make a difference for skin-to-skin, what to leave at home, and how to create a birth plan that your midwife will actually read.
To help you navigate this practical advice, here is a summary of the key areas we will cover. Each section is designed to give you the confidence that you are packing with purpose and an insider’s understanding.
Summary: Your Strategic Guide to NHS Hospital Bag Packing
- Why You Need Your Own Maternity Pads When NHS Ones Are Sandpaper-Grade?
- How to Pack One Bag That Works for Water Birth, Emergency C-Section, and Everything Between?
- Why Button-Front Nightdresses Beat Pyjamas for Skin-to-Skin and Breastfeeding?
- The 15 Items Every Packing List Includes That You Will Never Use on the Ward
- When to Separate Your Labour Bag from Your Postnatal Bag for Faster Access?
- Why You Need 3 Different Absorbency Levels of Maternity Pads for the First 2 Weeks?
- What to Wear During Labour When You Want to Stay Mobile and Comfortable?
- Why Your Birth Plan Should Fit on One Page for Busy Midwives to Actually Read?
Why You Need Your Own Maternity Pads When NHS Ones Are Sandpaper-Grade?
Let’s start with the least glamorous but most critical item in your postnatal bag: maternity pads. While it’s true the NHS will provide them, thinking of them as your primary supply is a rookie mistake. The free pads are functional, thick, and designed for one purpose: absorbing a heavy flow. They are not, however, designed for comfort. After childbirth, your perineal area is incredibly sensitive, and the coarse texture of standard-issue pads can feel, to put it bluntly, like sandpaper.
Your own comfort during those first few days is not a luxury; it’s a key part of your recovery. Postpartum bleeding, or lochia, is heaviest in the first few days, often requiring a pad change every one to two hours. You’ll want pads that are soft, absorbent, and long enough to provide security when you’re lying down. Investing in a few packs of high-quality, purpose-designed maternity pads will make a world of difference to your physical and psychological well-being.
Think of the NHS pads as your emergency backup, not your go-to. Having your own soft, comfortable supply is a simple act of self-care that you will be deeply thankful for at 3 a.m. on the postnatal ward. This is the first and most fundamental upgrade to your hospital bag. Choose comfort; you’ve earned it.
How to Pack One Bag That Works for Water Birth, Emergency C-Section, and Everything Between?
The biggest packing anxiety comes from the unknown. Will you have a water birth? Might it end in an emergency C-section? The answer is to ditch the « one-bag-fits-all » approach and adopt a modular packing system. Instead of one giant bag, you organise your items into smaller, labelled packing cubes or bags for each potential scenario. This keeps things organised and ensures you or your partner can find exactly what’s needed in a high-stress moment without emptying the entire contents onto the floor.
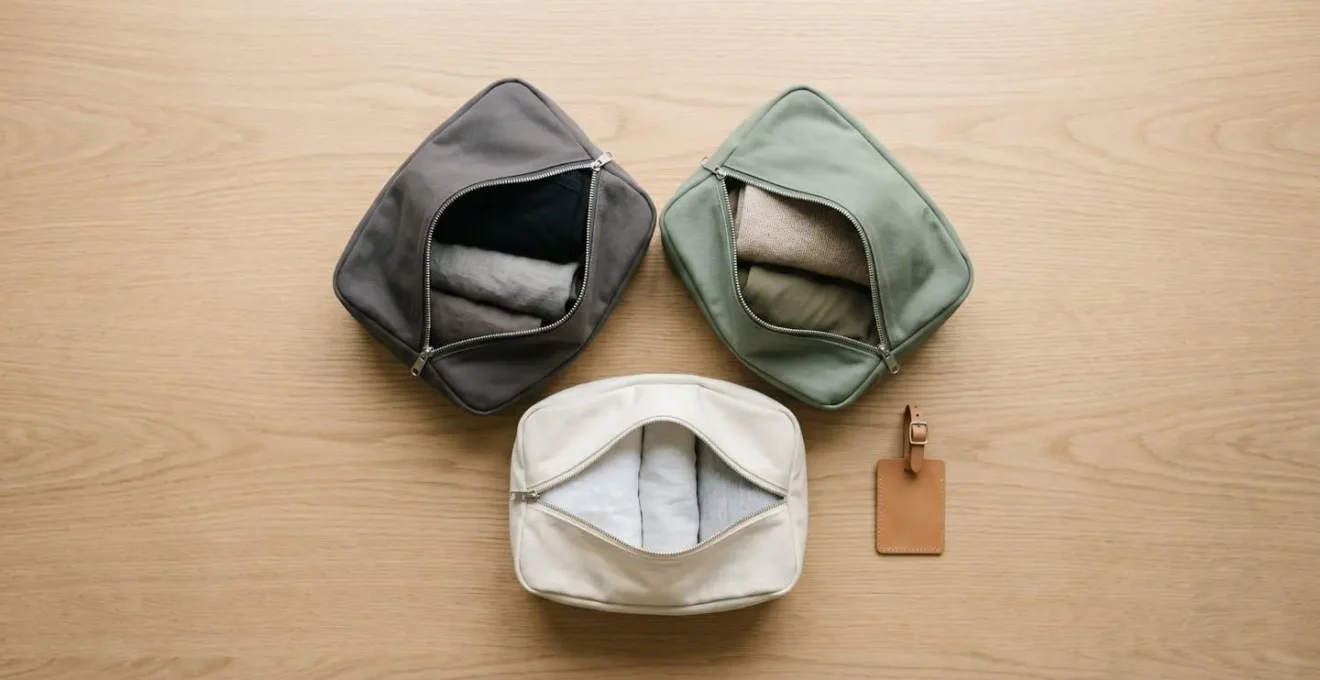
This system has a core bag with universal essentials, supplemented by specific modules. Your partner can grab the C-section module from the car if plans change, or you can easily access your water birth items without digging past recovery aids you don’t need yet. It’s a strategy that brings calm and control to an unpredictable process.
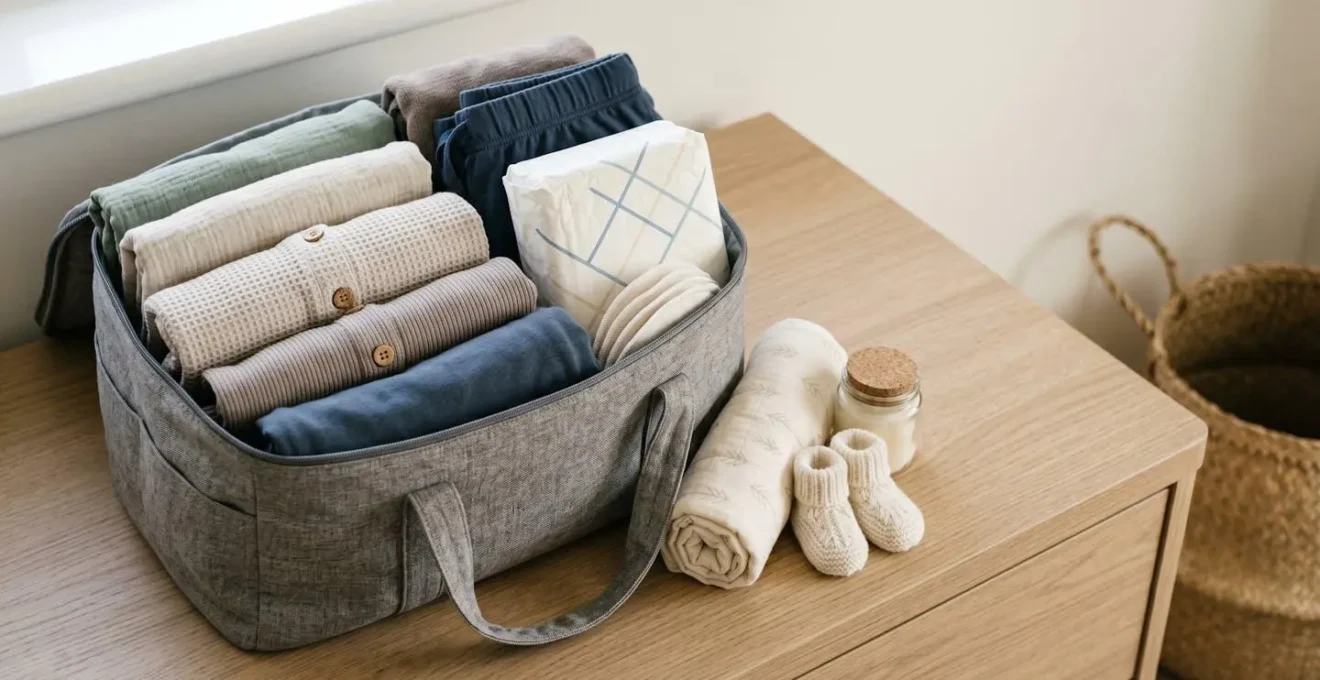
- Core Bag: This is your non-negotiable grab-bag. It contains your hospital notes, a phone charger with a long cable, basic toiletries (travel size!), and your first-line recovery items like maternity pads and dark-coloured underwear.
- Water Birth Module: A small, separate bag with a dark-coloured bikini top or sarong, flip-flops for the wet floor, and an extra towel.
- C-Section Recovery Module: This contains high-waisted underwear that won’t irritate a scar, a comfortable nightdress (not pyjamas), peppermint tea bags to help with trapped wind, and some high-fibre snacks.
- Car Boot Stash: This is your backup. Extra outfits for you and baby, more recovery supplies, and anything you might need for an extended stay. Your partner can bring this to the postnatal ward later.
Why Button-Front Nightdresses Beat Pyjamas for Skin-to-Skin and Breastfeeding?
When packing for comfort, many first-time mothers reach for their favourite pyjamas. However, on the postnatal ward, a simple, dark-coloured, button-front nightdress is infinitely more practical. The reason comes down to two key activities: immediate skin-to-skin contact and establishing breastfeeding. Both require quick, easy, and often one-handed access to your chest.
Experts agree that uninterrupted skin-to-skin contact helps regulate a baby’s temperature, breathing, and heart rate. Fumbling with a pyjama top or t-shirt is a barrier to this. A nightdress can be unbuttoned in a second with one hand while you cradle your newborn. This simple piece of clothing design respects the importance of this critical bonding time.
The Golden Hour and One-Handed Accessibility
The first hour after delivery, often called the ‘Golden Hour’, is crucial for initiating bonding and the first feed. Immediate, uninterrupted skin-to-skin is paramount. A button-front nightdress facilitates this seamlessly, allowing one-handed access while you hold your baby. Trying to pull up a pyjama top or a standard t-shirt often requires two hands, disrupting the moment. Furthermore, many mothers experience postnatal night sweats, and specialised nightdresses made from bamboo or modal fabrics offer superior moisture-wicking properties compared to standard cotton pyjamas, significantly improving your comfort.
Beyond the first hour, you’ll be dealing with frequent feeds, midwife checks, and getting comfortable after birth. A nightdress is also more practical for managing postpartum bleeding and perineal care. Pyjama trousers can be cumbersome and restrictive. Opt for a few soft, functional nightdresses; they are the true workhorse of a postnatal wardrobe.
The 15 Items Every Packing List Includes That You Will Never Use on the Ward
Online checklists are notorious for encouraging overpacking. As experts like OB-GYN Dr. Sherry Ross often advise, space is extremely limited on postnatal wards, and a huge bag becomes a trip hazard and a source of stress. The reality is that your bedside area is tiny, and you need to be strategic. Your partner can always bring extras from the car later on.
The goal is to pack for the first 24-48 hours, not a week-long holiday. To help you edit your list down to the essentials, here are the common items we see packed that are almost never used:
- A book or magazine: You will be too busy, tired, or engrossed with your new baby to read.
- A full makeup bag: A tinted lip balm and concealer are fine, but a full contouring kit is unnecessary.
- Multiple ‘going home’ outfits for the baby: They need one. That’s it. And it will likely get messy.
- Your own pillow: While tempting, it’s a bulky item that can pick up germs. Leave it for home and use the (admittedly flat) hospital ones for the short stay.
- Dozens of nappies: Pack about 10-15 to get you started. The hospital will have some, and you can get more from your car stash.
- Jewellery or valuables: Leave them at home for safekeeping.
The most concrete advice comes directly from the source. As many NHS hospital guidelines advise, a small holdall or cabin-sized suitcase is all that’s recommended for the mother. This forces you to be ruthless and pack only what truly matters for your immediate recovery and comfort.
When to Separate Your Labour Bag from Your Postnatal Bag for Faster Access?
The single most effective packing strategy is the three-bag system. Instead of one large, cumbersome bag, you divide your belongings into three smaller, purpose-driven bags. This system aligns perfectly with your journey through the hospital, from arrival to the postnatal ward, ensuring you aren’t burdened with unnecessary items at any stage.
This approach isn’t just about organisation; it’s about managing stress and physical space. You won’t have room for a large suitcase in a triage waiting area or a delivery suite. By separating your bags, you and your partner know exactly what to grab and when, making the entire process smoother for everyone involved, including the staff.
Here’s how the three-bag system works in practice:
- The Triage Micro-Bag: This is a small tote or backpack containing only the absolute essentials for your initial assessment. It should hold your maternity notes, a drink, a snack, your phone, a hair tie, and lip balm. This bag stays with you at all times.
- The Labour Bag: This is a slightly larger duffle bag with everything you need for the birth itself. This includes your comfortable clothes for labour, TENS machine, and any other personal comfort items. This bag comes with you to the delivery suite.
- The Postnatal Bag: This is your largest bag, which is best left in the car or with your birth partner until after the baby is born and you’ve been transferred to the more spacious postnatal ward. It contains your recovery items, baby’s first clothes, extra maternity pads, and toiletries for showering.
By adopting this method, you travel light and efficiently through the different stages of your hospital stay. It’s the ultimate ‘insider’ trick for a calmer, more organised birth experience.
Why You Need 3 Different Absorbency Levels of Maternity Pads for the First 2 Weeks?
Just as you wouldn’t use a single tool for a multi-step project, you shouldn’t rely on a single type of maternity pad for the entire duration of your postpartum bleeding. Lochia changes significantly in volume and consistency over the weeks following birth, and having the right pad for each stage is key to feeling comfortable, confident, and clean.
Relying on one ‘super-absorbent’ type throughout is inefficient and uncomfortable. Using a bulky pad when you only need a light liner can feel awkward and prevent you from wearing your normal clothes. Conversely, being caught with a light pad during the initial heavy flow is a recipe for stress. According to postpartum bleeding research, which indicates a duration of 2-6 weeks, your needs will evolve dramatically. A staged approach is the most sensible solution.
This comparative table breaks down the stages of lochia and the type of pad best suited for each one. It’s the ‘why’ behind the need for a multi-pad strategy in your postnatal toolkit.
| Lochia Stage | Timeline | Flow Characteristics | Recommended Pad Type | Activity Level |
|---|---|---|---|---|
| Lochia Rubra | Days 1-5 | Bright red, heavy flow, blood clots | Heavy-duty maternity pads (extra-long, wings) | Mostly bed-bound recovery |
| Lochia Serosa | Days 5-10 | Pinkish-brown, lighter flow | Standard maxi pads | Increasing mobility, short walks |
| Lochia Alba | Days 10-42 | Yellowish-white, minimal discharge | Light panty liners | Normal activity resumed |
What to Wear During Labour When You Want to Stay Mobile and Comfortable?
During labour, your clothing needs to serve three purposes: provide dignity, allow for freedom of movement, and grant midwives easy access for monitoring. Many hospitals offer a standard gown, but having your own options can make you feel more in control and comfortable. The key is to choose items that are loose, breathable, and made from dark-coloured fabric.
A large, old t-shirt, a button-front nightdress, or a comfortable labour-specific gown are all excellent choices. Avoid anything restrictive around your waist or legs. If you’re considering a water birth, a bikini top or a sports bra that you don’t mind getting wet is a great option. The goal is to wear something you can forget about, allowing you to focus on your labour. While practical clothing is key, one of the most frequently forgotten items is surprisingly small and simple.
As NHS Midwifery Sister Pip Davies points out in a guide for expecting parents, a simple tube of lip balm is a non-negotiable item.
Lip balm is a surprise essential, as lips often become very chapped during labour, particularly if you’re using gas and air for pain relief.
– Pip Davies, NHS Midwifery Sister, For The Creators – Hospital Bag Guide
This is a perfect example of an ‘insider’ tip. It’s a small detail that makes a huge difference to your comfort during the long hours of labour. Pack one in your pocket or your triage micro-bag so it’s always within reach.
Key Takeaways
- Adopt a modular, three-bag system (Triage, Labour, Postnatal) instead of one large, overwhelming bag.
- Prioritise your own recovery with items like high-waisted underwear, multiple levels of maternity pads, and button-front nightdresses.
- A one-page, scannable birth ‘preferences’ document is far more likely to be read and respected by a busy midwifery team.
Why Your Birth Plan Should Fit on One Page for Busy Midwives to Actually Read?
A birth plan is a valuable tool for communicating your wishes, but its effectiveness depends entirely on its format. A multi-page, detailed document handed to a midwife during a busy shift is, unfortunately, unlikely to be read thoroughly. On a high-pressure labour ward, time is the most scarce resource. With some NHS data showing major trusts delivering an average of 25 babies daily, midwives need to absorb crucial information during handovers in 60 seconds or less.
The secret to a useful birth plan is to reframe it as ‘birth preferences’ and to design it for scannability. This signals flexibility and makes the team more receptive. Your goal is to create a one-page visual dashboard, not a legal document. It should highlight your key priorities in a way that can be understood at a glance.
By making your preferences easy to digest, you are not ‘dumbing it down’; you are strategically empowering your care team to advocate for you. A concise, clear, one-page document is a sign of respect for their time and the most effective way to ensure your core wishes are seen and heard.
Your Action Plan: The One-Page Birth Preferences Checklist
- Rename for Receptiveness: Title your document ‘Birth Preferences’ instead of ‘Birth Plan’. This simple change signals flexibility and collaboration to your midwifery team.
- Format for Scannability: Use clear, bold headings (e.g., Pain Relief, Labour Environment), bullet points, and plenty of white space. The goal is for a midwife to grasp your key wishes in under 60 seconds during a shift change.
- Use Visual Cues: Incorporate simple, universally understood icons. A water drop symbol for a pool preference or a walking figure for mobility can convey information faster than text.
- Prioritise Ruthlessly: Limit the content to your most important preferences only. Focus on your approach to pain relief, mobility, the ‘golden hour’ after birth, and your feeding intentions.
- Enforce the One-Page Rule: This is non-negotiable. If it doesn’t fit on a single A4 page, it’s too long. A second page will almost certainly be ignored during a hectic handover on the ward.
With these strategies, your hospital bag transforms from a source of anxiety into a well-organised toolkit for a more confident and comfortable birth experience. You are now ready to pack not just with a list, but with the true understanding and foresight of a seasoned pro.