The most dangerous myth new parents believe is that babyproofing starts when their baby moves. The truth is, the life-saving work begins months before, while they are still immobile.
- Predictable developmental leaps mean you can anticipate future hazards like climbing and crawling today.
- The deadliest risks, like furniture tip-overs and suffocation, are entirely preventable with early environmental design.
Recommendation: Start your audit now. This guide provides the strategic, time-phased plan to secure your home before the ‘hazard horizon’ arrives.
As a new parent in the UK, you look at your three-month-old, peacefully immobile, and the thought of babyproofing feels distant, almost absurd. The house is quiet. The dangers seem a lifetime away. This is the most critical period of misplaced calm. You are not preparing for the baby you have now; you are preparing for the seven-month-old you can’t yet imagine—a surprisingly fast, dangerously curious explorer who will test the laws of physics with every object in your home. The common advice is to « wait until they’re on the move, » but this is a reactive stance that puts your child’s life at risk. Waiting until they crawl is like starting to build a lifeboat after the ship has already hit the iceberg.
The standard approach involves covering a few plug sockets and perhaps locking the bleach away once your baby starts to get into things. But this misses the silent, catastrophic risks: the unstable chest of drawers that becomes a climbing frame, the trailing blind cord that becomes a noose, the beautifully styled cot full of soft toys that becomes a suffocation trap. These are the incidents that lead to preventable Accident & Emergency visits. The key isn’t to react to your child’s mobility. The key is predictive safety: using your knowledge of their predictable developmental timeline to eliminate hazards before they even become a threat. It’s about shifting from a mindset of constant vigilance to one of smart environmental design.
This guide is your urgent action plan. It is not a list of suggestions; it is a strategic, time-phased intervention. We will move beyond the platitudes and give you the professional framework to see your home through the eyes of a future crawler and climber. We will dissect hazards by age, expose the hidden dangers in modern furniture, clarify safety standards for critical equipment like stair gates, and give you a concrete audit system. Your window of opportunity to act is now, during these quiet months. The work you do today is what keeps your child safe tomorrow.
This article provides a structured, room-by-room approach to systematically identify and neutralise every potential hazard in your home, well before your child becomes mobile. Follow this guide to transform your living space into a secure environment for exploration and growth.
Summary: Your Proactive Babyproofing Action Plan
- Which Hazards to Address at 4 Months vs 8 Months vs 12 Months?
- Why Unsecured IKEA Furniture Kills More Toddlers Than You Would Expect?
- Pressure-Fit vs Hardware-Mounted Stair Gates: Which Passes the BS EN 1930 Standard?
- Why Your Trailing Houseplants Are a Strangulation and Poisoning Risk in One?
- How to Audit Each Room for Hazards Using a 50-Point Safety Checklist?
- The Instagram Nursery Trend That Puts Soft Toys Where They Can Suffocate Your Baby
- How to Set Up Your Living Room So Your Baby Wants to Move and Explore?
- Why Magnetic Locks Beat Plastic Latches for Keeping Medicines Away From Toddlers?
Which Hazards to Address at 4 Months vs 8 Months vs 12 Months?
Effective babyproofing is not a one-time event; it’s a phased strategy that aligns with your child’s predictable developmental leaps. What is safe for a 4-month-old is a severe hazard for an 8-month-old. Understanding this « hazard horizon » allows you to stay one step ahead, neutralising dangers before your child acquires the skill to find them. The biggest mistake is waiting for mobility to start proofing. The work must begin while they are still largely stationary, focusing on their immediate environment and the skills they are about to develop.
At around four months, your baby enters the ‘Rolling Radius’ phase. They can’t crawl, but they can roll, pivot, and reach. Your focus must be on a 1.5-meter circle around them at all times. This means hot drinks, phones, and small objects must be kept well outside this zone. By eight months, they enter the ‘Crawl-Line View’ phase. Now, you must get on your hands and knees and see the world from their perspective. This is when you’ll discover the unsecured electrical outlets, the coins under the sofa, and the tempting, toxic cleaning supplies in low cabinets. This is also when anchoring furniture becomes non-negotiable, as a 30-year study revealed that 69.9% of furniture tip-over injuries happen to children under six.
By twelve months, your child has entered the ‘Vertical World’. They are pulling up, climbing, and opening things. Your strategy must now extend upwards. Hardware-mounted stair gates become mandatory at the top of all stairs. Drawers become ladders, so they must be secured. Everything from the oven door to the dishwasher needs to be locked. This phased approach transforms babyproofing from a panicked reaction into a calm, controlled, and effective safety protocol.
Your Time-Phased Safety Action Plan
- 4-Month ‘Rolling Radius’ Phase: Secure all items within a 1.5-meter circle of where the baby is placed. Move hot beverages, install cordless window coverings, and ensure safe sleep surfaces with no soft items.
- 8-Month ‘Crawl-Line View’ Phase: Conduct a floor-level audit. Secure all electrical outlets, lock cabinets with cleaners, remove small objects from under furniture (especially button batteries), and anchor all unstable furniture to walls.
- 12-Month ‘Vertical World’ Phase: Install hardware-mounted stair gates at the top of stairs. Secure lower drawers that can be used as climbing steps. Move cleaning products to high, locked cabinets. Install appliance locks on ovens and dishwashers.
Why Unsecured IKEA Furniture Kills More Toddlers Than You Would Expect?
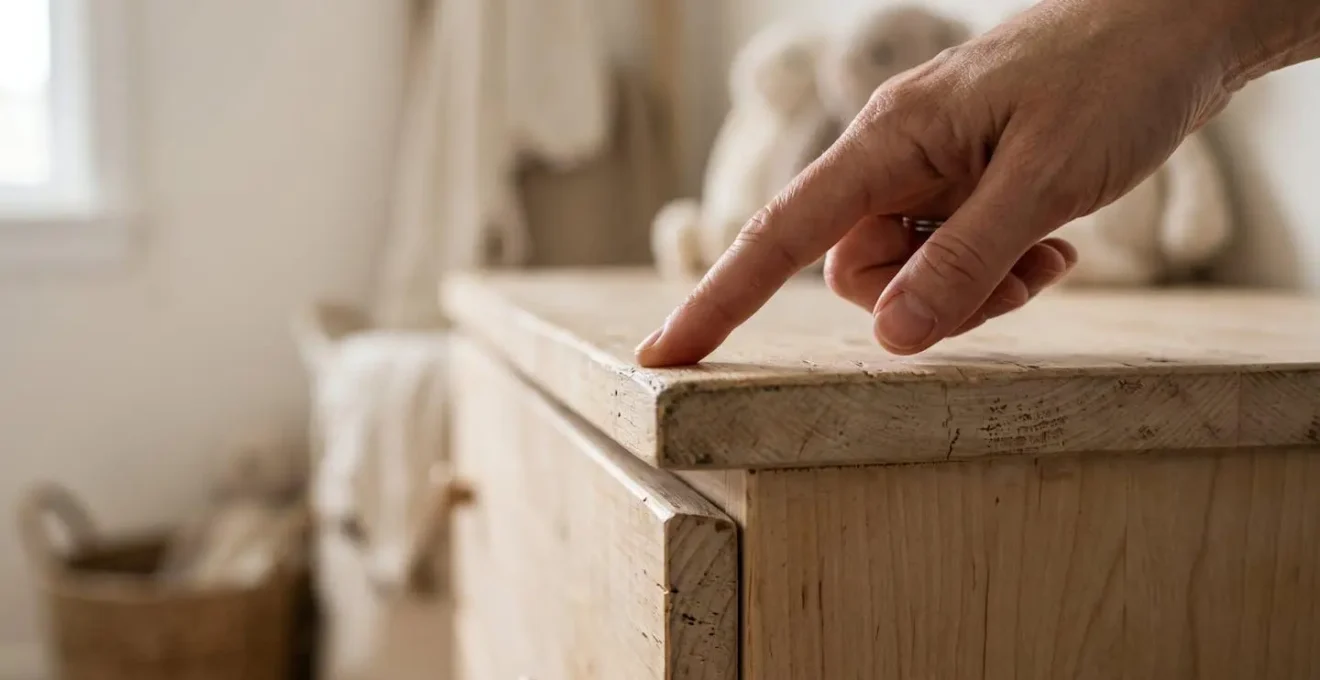
The term ‘IKEA’ here is not just about one brand; it represents a modern furniture epidemic: lightweight, top-heavy, flat-pack designs that parents assemble themselves. These pieces, especially chests of drawers, have a high centre of gravity and a narrow base, making them inherently unstable. To a toddler learning to pull up and climb, an unanchored dresser is an irresistible and deadly piece of equipment. The drawers act as a ladder, and as the child’s weight shifts upwards, the furniture’s centre of gravity moves past its tipping point. The result is catastrophic.
The physics are brutal and unforgiving. A small child pulling on an open top drawer can exert enough leverage to topple a dresser weighing many times more than they do. The U.S. Consumer Product Safety Commission reports that 93% of tip-over fatalities involve children five and under, with many crushed by the weight of the furniture. This is not a freak accident; it is a predictable outcome of unstable design combined with a child’s natural exploratory behaviour. The risk is hidden in plain sight, in almost every modern nursery and bedroom.
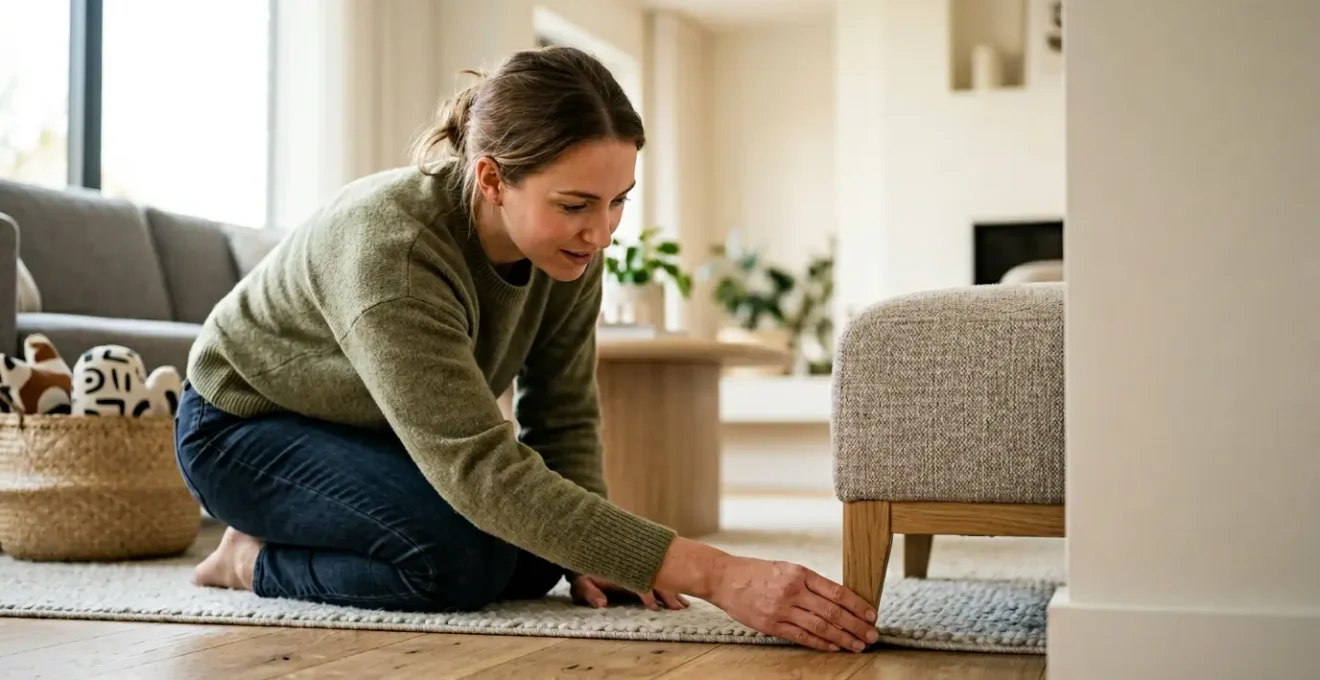
This paragraph introduces a complex concept. To well understand it, it’s useful to visualize its main components. The illustration below breaks down this process.
As this image demonstrates, it takes very little force at the top edge to create a tipping moment. Your child’s body weight is more than enough to cause a fatal tip-over. Testing for stability is a critical, non-negotiable step for every piece of furniture in your home.
The IKEA MALM Dresser Tragedy
The danger was made tragically public with the IKEA MALM dresser recall. After multiple child deaths, the company paid $46 million to the family of a 2-year-old boy killed by a tipped dresser in 2017. The case became emblematic of the hidden danger of modern, self-assembled furniture. Parents often underestimate its instability compared to older, heavier pieces. The lesson is stark: every piece of furniture over 60cm tall, regardless of brand or perceived weight, must be anchored securely to a wall. The anti-tip kits included with furniture are not optional extras; they are life-saving devices.
Pressure-Fit vs Hardware-Mounted Stair Gates: Which Passes the BS EN 1930 Standard?
When it comes to stair safety, there is no room for compromise or convenience. The choice between a pressure-fit and a hardware-mounted gate is not a matter of preference; it is a matter of life and death, especially at the top of a staircase. The relevant safety standard in the UK and Europe is BS EN 1930. This standard specifies the safety requirements and test methods for child safety barriers. While both types of gates can meet this standard for use in doorways or at the bottom of stairs, only one is safe for the top.
A pressure-fit gate works by expanding to create tension against the door frame or walls. Its primary failure point is force. A determined toddler, or even an adult stumbling against it, can dislodge it. Placing a pressure-fit gate at the top of a flight of stairs introduces a catastrophic risk: if the gate fails, the child falls down the stairs with the gate on top of them. This is why their use in this location is a critical safety failure. Furthermore, many pressure-fit gates have a bottom bar that runs along the floor, creating a permanent trip hazard at the top of the stairs—a danger for parents carrying a baby.
A hardware-mounted gate, by contrast, is screwed directly and securely into the wall or banister. It becomes part of the house’s structure. It cannot be pushed over. It swings open like a door and has no trip bar at the bottom. This is the only type of gate that should ever be used at the top of stairs. As the UK’s leading safety charity, the Royal Society for the Prevention of Accidents (RoSPA), states unequivocally:
Pressure mounted gates are sometimes considered unsafe for use on stairs because they can by pushed over with force. This type of gate is not safe to use on stairs.
– Royal Society for the Prevention of Accidents (RoSPA), SafeKids UK – Safety Gate Standards
The choice is not a choice. For the top of any staircase, a hardware-mounted gate that complies with BS EN 1930 is the only acceptable safety solution. Using a pressure-fit gate in this location is an act of negligence.
Why Your Trailing Houseplants Are a Strangulation and Poisoning Risk in One?
Aesthetically pleasing houseplants, especially popular trailing varieties like Pothos or Philodendron, introduce a dual-threat into a home with a mobile baby: poisoning and strangulation. Parents are often aware of the toxicity of certain plants, but they underestimate a child’s determination to reach them. A crawling baby will see a dangling vine not as a plant, but as a rope to be pulled or a fascinating object to be tasted. This creates two immediate and severe risk scenarios.
The first is poisoning. Many common houseplants are toxic if ingested, causing anything from mild irritation to severe internal damage. According to the New York Botanical Garden, ingestion of household plants is one of the leading reasons for calls to poison control centres for children under five. A baby only needs to chew on a single fallen leaf to be at risk. The second, less obvious danger is strangulation and impact. A baby pulling on a trailing vine can easily bring a heavy pot crashing down on top of them. The vine itself, if long and strong, can also become a strangulation hazard if it gets wrapped around their neck during a fall or struggle.
The only safe approach is to assume all plants are a hazard. Placing them on a « high shelf » is often not enough, as children are resourceful climbers. The concept of an « inaccessible » location must be rigorously tested. A true safety hierarchy is required, where the default is that no plant should be within reach, and extra precautions are taken even for those that are seemingly out of the way.
Your Safe Plant Setup Hierarchy
- Tier 1 – Safest: Place all plants in rooms children cannot access unsupervised. This is the only guaranteed safe option for toxic varieties.
- Tier 2 – Good: Use high, inaccessible shelves (minimum 2 metres) with absolutely no trailing vines. Ensure pots are stable and cannot be tipped.
- Tier 3 – Risky: Hanging baskets are only acceptable if the suspension point is unreachable and no leaves or vines can be pulled or fall to the floor.
- Tier 4 – Unacceptable: All floor plants are prohibited in homes with mobile children due to pot-tipping, soil ingestion, and fertilizer access risks.
- Critical Add-On: Cover all accessible plant soil with secured mesh to prevent ingestion of soil, fertilizer sticks, and perlite.
How to Audit Each Room for Hazards Using a 50-Point Safety Checklist?
To effectively babyproof your home, you must stop seeing it as a living space and start seeing it as a potential obstacle course filled with hazards. You need a systematic audit process. This is not a casual walk-through; it is a forensic examination conducted from the perspective of a curious, determined, and physically unaware child. Get on your hands and knees. Open every low cabinet and drawer. Pull on every cord. Push on every piece of furniture. Your goal is to identify and neutralise every potential source of impact, falls, choking, ingestion, strangulation, burns, and drowning.
The scale of the problem is significant and often underestimated. For example, an estimated average of 11,000 children are treated in hospital emergency rooms every year in the U.S. for tip-over injuries alone. This statistic highlights just one category of danger. Your audit must be comprehensive, covering everything from the obvious (locking medicine cabinets) to the insidious (the button battery that fell out of a remote and rolled under the sofa). Use a checklist and be methodical, room by room, hazard by hazard.
One of the most effective audit techniques is the ‘Visitor Test’. After you have done your own comprehensive check, invite a friend or family member who does not have young children to walk through your home. You have become accustomed to your environment and may suffer from ‘hazard blindness’. A fresh pair of eyes will often spot dangers you have completely overlooked, providing a crucial final layer to your safety audit.
Your Comprehensive Home Safety Audit Checklist
- Impact & Fall Hazards: Anchor all furniture taller than 60cm. Install corner guards on sharp edges. Secure window guards to limit opening to 10cm. Check stair railings for gaps wider than 10cm.
- Choking & Ingestion Hazards: Scan floors for objects smaller than a toilet paper roll’s diameter. Lock all medicines, cleaning products, laundry pods, and batteries away. Check under furniture for dropped pills and coins.
- Strangulation & Entrapment: Replace all corded window blinds with cordless versions. Ensure no accessible cord loops are longer than 18cm. Secure trailing plant vines.
- Electrical & Burn Hazards: Cover all accessible outlets. Secure appliance cords. Set water heater to a maximum of 49°C. Install stove knob covers and keep hot drinks out of reach.
- Drowning & Water Access: Never leave buckets with water. Install toilet lid locks. Supervise all bath time within arm’s reach.
The Instagram Nursery Trend That Puts Soft Toys Where They Can Suffocate Your Baby
There is a dangerous disconnect between the nurseries promoted on social media and the principles of safe infant sleep. Instagram and Pinterest are filled with beautifully styled cots, artfully arranged with plush toys, decorative pillows, cot bumpers, and cosy blankets. While aesthetically pleasing, this trend is a death trap. For a baby under 12 months, the only thing that should be in their cot is a firm mattress with a tightly fitted sheet. Nothing else. This is the non-negotiable ‘Bare is Best’ rule.
The danger lies in the mechanism of suffocation and SIDS (Sudden Infant Death Syndrome). Soft objects create pockets of trapped air. When a baby’s face presses against a stuffed animal or a cot bumper, they can rebreathe their own exhaled carbon dioxide. This deprives them of fresh oxygen, leading to hypercapnia and hypoxia, which can be fatal. The American Academy of Pediatrics has been unequivocal for years: soft bedding is a primary risk factor for sleep-related infant deaths. The visual trend of a ‘full’ and ‘cosy’ cot directly contradicts decades of pediatric safety research.
This paragraph introduces a complex concept. To well understand it, it’s useful to visualize its main components. The illustration below breaks down this process.
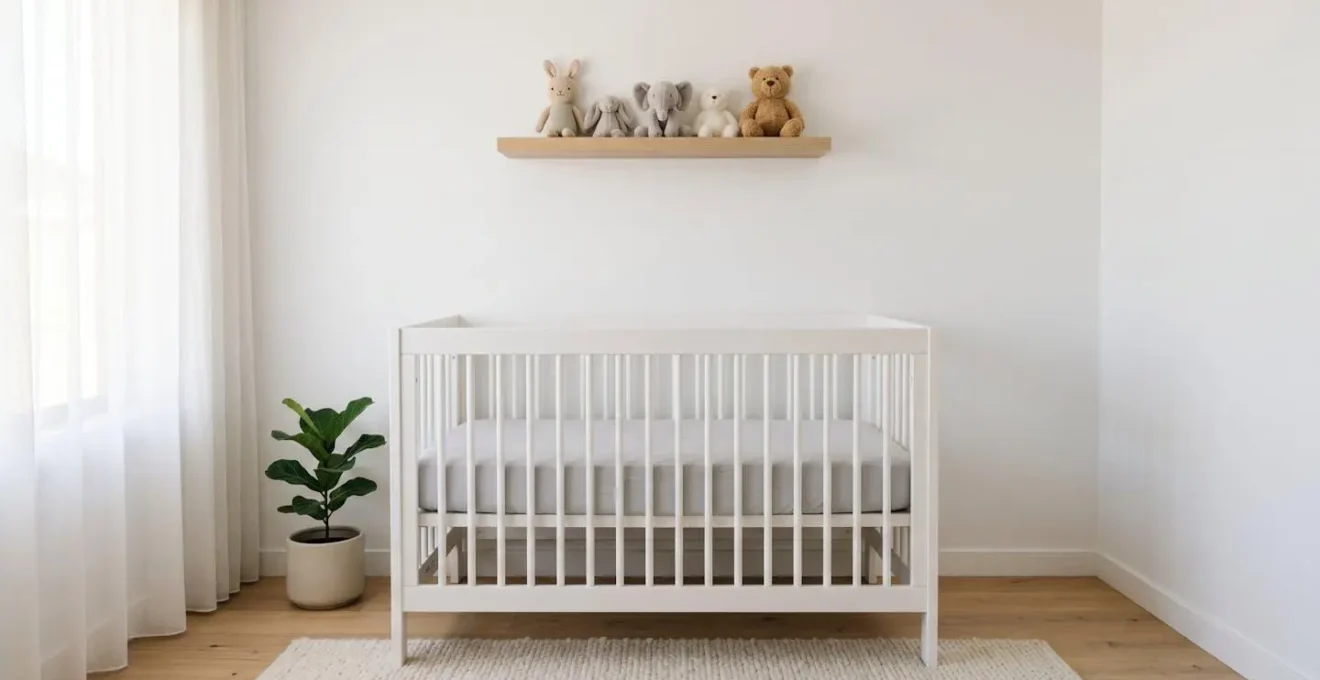
As you can see, a safe nursery can still be beautiful. The key is to draw a hard line between ‘decorative’ items and ‘active’ sleep items. Toys and soft furnishings belong on high shelves or outside the cot entirely, not where your baby sleeps unsupervised.
The Active vs. Decorative Rule
To reconcile aesthetics with safety, you must adopt the ‘Active vs. Decorative’ rule. Any toy or soft object inside the cot is ‘active’ and must be removed for all sleep periods. Toys on a high shelf, prints on the wall, or items in a display case are ‘decorative’ and pose no risk. If you want to take a styled photo for social media, you may place items in the cot for the picture, but they must be removed immediately after, and the baby should never be left unattended in that environment. Your child’s life is more important than your Instagram feed. The ‘bare is best’ rule is not a guideline; it is a life-saving mandate.
How to Set Up Your Living Room So Your Baby Wants to Move and Explore?
Your role as a parent is not to constantly restrict your child, but to create an environment where they can explore safely. The philosophy of Emmi Pikler and RIE (Resources for Infant Educarers) champions the idea of a ‘Yes Space’. This is a designated area of your home—typically a section of the living room—that has been so thoroughly babyproofed that the baby can be left to explore freely without constant parental intervention or hearing the word ‘no’. This approach fosters independence, confidence, and gross motor skill development in a secure setting.
Creating a ‘Yes Space’ involves a paradigm shift. Instead of adding locks and barriers to a dangerous environment, you remove all dangers from one specific zone. Anchor the furniture, cover the outlets, remove all choking hazards and toxic plants. Once the space is 100% safe, you then furnish it with ‘movement provocations’—simple, safe objects that invite exploration. A low, sturdy cushion to crawl over, a shatterproof mirror at floor level, a stable coffee table to practice pulling up on. These objects encourage your baby to solve their own movement problems, building resilience and motor planning skills.
In this model, the parent’s role changes from ‘policeman’ to ‘secure base’. You sit on the floor within the ‘Yes Space’, present and available, but not hovering. Your calm presence gives the child the confidence to move away, explore the challenges you’ve set up, and return for reassurance. You allow them to experience safe struggle—the effort of reaching a toy or pulling themselves up. This is how they learn the limits of their bodies and the physics of their world in the safest way possible.
Designing Your ‘Yes Space’
Start by using furniture to section off a 3-4 square metre area of your living room. Conduct a rigorous hazard audit within this zone. Place a thick play mat in the centre to create a soft-fall area. Then, introduce simple items: a small wooden stool (20cm high) for pulling up, a few colourful silicone stacking cups, and a fabric ball. Rotate these ‘provocations’ weekly to maintain interest. By designing the environment for safety and exploration, you give your child the freedom to develop their abilities, and you give yourself the freedom from constant anxiety and intervention.
Key Takeaways
- Act Early, Not Reactively: The most effective babyproofing happens months before your baby is mobile, based on predictable developmental stages.
- Anchor Everything: Lightweight, modern furniture is a primary tip-over risk. Anchoring all items taller than 60cm to the wall is non-negotiable.
- Bare is Best for Sleep: For babies under 12 months, the only safe sleep environment is a cot with a firm mattress and a fitted sheet. No soft toys, bumpers, or loose blankets.
- Understand the Risk Hierarchy: Not all hazards are equal. Use invisible magnetic locks for medium-risk items and dedicated lockboxes for high-risk substances like medication.
Why Magnetic Locks Beat Plastic Latches for Keeping Medicines Away From Toddlers?
Not all cabinet locks are created equal. While the common plastic latches you find in supermarkets are better than nothing, they are a deeply flawed solution for securing medium- to high-risk items like cleaning supplies and medicines. Their primary failure point is not the child, but the adult. These latches require a conscious action to re-engage every single time you close the cabinet. In the exhaustion of new parenthood, it is almost guaranteed that they will be left unlatched, rendering them useless.
Furthermore, plastic latches are visible. To a curious toddler, a visible mechanism is a puzzle to be solved. They will watch you, learn, and many can defeat these simple latches with surprising speed. Magnetic locks, while more expensive and complex to install, solve both of these critical problems. They are installed on the inside of the cabinet, making them completely invisible to the child. If the child doesn’t know a lock exists, they are far less likely to try to defeat it. Most importantly, they engage automatically every time the door is closed. This removes the risk of human error, which is the single biggest vulnerability in any safety system.
This table compares the two main types of locks, highlighting the clear superiority of magnetic locks for securing any item that could cause harm.
| Feature | Plastic Latches | Magnetic Locks |
|---|---|---|
| Primary Failure Point | Adult forgetting to re-latch (user error dominant) | Auto-engages on door close; minimal user error |
| Visibility to Child | Visible latch invites toddler curiosity and attempts to defeat | Hidden inside cabinet; child unaware lock exists (invisible security) |
| Toddler Defeat Risk | Persistent toddlers can learn release mechanism by observation | Requires magnetic key; toddler cannot access or understand mechanism |
| Installation Complexity | Simple adhesive or screw-mount; 5-10 minutes per cabinet | Requires precise alignment; 15-20 minutes per cabinet; may need drill |
| Adult Convenience | Frustrating to unlatch repeatedly; often left unlatched when tired | One-hand magnetic key operation; higher compliance rate |
| Cost Range | £2-£8 per latch | £12-£25 per lock (includes magnetic key) |
A three-tier security hierarchy is the only responsible approach. Use plastic latches for low-risk items like Tupperware. Use magnetic locks for medium-risk items like cleaning supplies. And for high-risk, life-threatening items like prescription medications, vitamins with iron, and button batteries, you must use a dedicated lockbox stored in a high cabinet, with a magnetic lock on the cabinet door as a secondary layer of defence. Never rely solely on ‘child-resistant’ packaging; it is merely ‘child-delaying’.
Your child’s safety depends on systems, not on your constant, flawless vigilance. By implementing these strategic, predictive measures now, you are not just preventing accidents; you are building a secure foundation that allows your child the freedom to explore, learn, and thrive. Start your home safety audit today.